
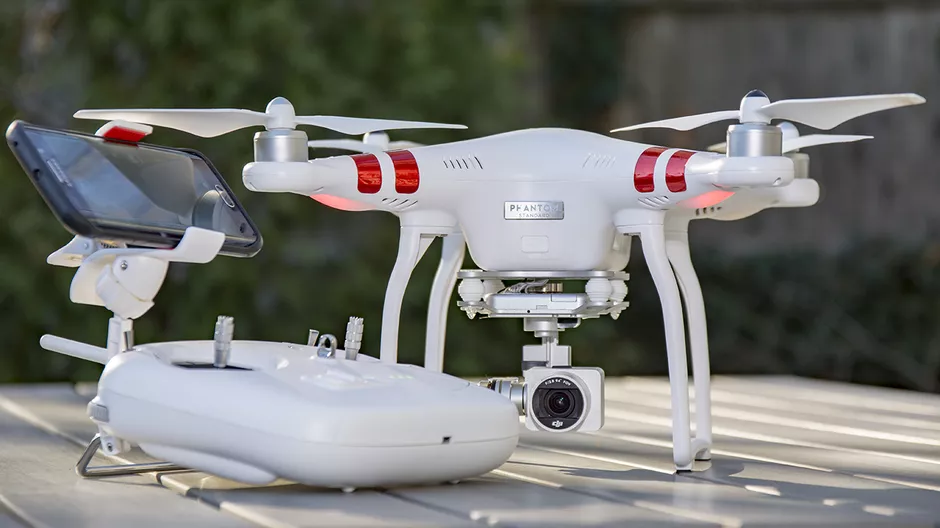
Imagine having a sunny day and you are trying to have nice drone shots. Then you are going to the drone and try to turn it on but the drone won’t turn on. Feels so bad, right? If you are having this kind of situation don’t worry because I’m here to help you to fix it. I have seen many drone pilots searching to solve this issue.
That’s why this issue took my attention to find out why this kind of issue happens. So I went through more forums, videos, and articles and also talked with experienced pilots and I’m proudly here today to unleash all the things I found.
Why drone won’t turn on
Usually, drone won’t turn on because of battery management system shutdowns, improper battery temperature, fully discharged/damaged battery, and the damaged power switch. Also if you have a DJI drone, it’s worth checking whether you are turning on the drone properly.
Reason 1: Improper switching on.
As I said before, If you are new to modern drones, It’s always ok to check whether you are doing this right. Because usually, they won’t turn on just by one press. First, read the drone’s user manual and check whether you are doing it right.
- If you have a DJI drone, press the power button once, then press again and hold it down for approximately 4 seconds.
Reason 2: Battery Management System (BMS) shutdown.
Most of the time, DJI drones won’t turn on because of this issue. When the battery has gone below a certain limit or faces power failures, the BMS (Battery Management System) would raise PF flags and shuts down the battery. So in order to recover the battery, you have to clear the PF flags of the battery management system.
Reason 3: The battery has gone into hibernation mode
Intelligent drone batteries have safety features to save the battery from being fully discharged. Hibernation mode is one of them. When you left or store the battery for a long term and once the battery is discharged to a certain limit, the battery would go into hibernation and it won’t turn on and power the drone until you wake it from hibernation.
- Most of the time, you just have to plug the battery into the charger and leave it for a few hours to wake the battery from hibernation.
Reason 4: The battery is too hot or cold
Modern drone intelligent batteries have many sensors embedded inside them. Those things can measure factors like temperature that affect the battery. So when the battery gets too cold or hot, (which is not healthy for the battery) it would refuse to turn on. Usually, the drone battery functioning temperature range is between 41°F – 104°F (5°C – 40°C).
If the battery is warm,
If you just finished a flight or you left the battery or the drone in a closed warm area, the battery might have temporarily shut down.
- If the battery is too hot, leave it somewhere safe with good airflow. Wait approximately 30 minutes to reach room temperature.
If the battery is cold,
Most of the time, some users who live in frigid areas and the winter season struggle with turning on the battery. Actually, it happens when the temperature goes below 5° C, the battery will stop working entirely.
- If you are in a frigid area or winter season, use a heated lipo battery bag to store the battery. If the battery is too cold, keep it inside your jacket for a few minutes to warm it to the proper temperature.
Reason 4: The battery contact or connectors are dusty or dirty
As I mentioned before, battery-related issues are the main reason for this situation in many cases. Having dirty or dusty battery contact or connectors is one of them. The thick dust sitting on the contact would make a lack of power supply to the drone. So the drone is not gonna turn on.
- Take the battery out and look at the slots. Use a brush and gently clean the battery connector ports and wipe the battery with a clean cloth. Also, clean the drone’s battery connectors too.
Next, we would talk about some troubleshooting for specific drones. Click on your drone on the below list to jump into that part of the article.
- DJI Mavic Pro won’t turn on.
- DJI Mavic Air won’t turn on.
- DJI Mavic Air 2 won’t turn on.
- DJI Air 2s won’t turn on.
- DJI Mavic 2 Pro/ Zoom won’t turn on.
- DJI Mavic Mini won’t turn on.
- DJI Mini 2 won’t turn on.
- DJI Spark won’t turn on.
DJI Mavic Air/Mavic Air 2/Mavic Air 2S/ Mavic 2 Pro/ Mavic 2 zoom/ Mavic Mini/DJI Mini2/Spark won’t turn on.
In most cases, DJI Mavic Air/Mavic Air 2/Mavic Air 2S/ Mavic 2 Pro/ Mavic 2 zoom/ Mavic Mini/DJI Mini2/Spark won’t turn on, when the battery has gone into hibernation and the battery management system has shut down.
Solution 1: Wake the battery from hibernation.
If you left or stored the battery, it might have gone into hibernation mode.
- Connect the Mini 2 battery to the charger and give it a few hours to wake from hibernation if it has gone into hibernation mode.
Solution 2: Clear PF flags from the battery management system.
These steps have helped many DJI DJI Mavic Air/Mavic Air 2/Mavic Air 2S/ Mavic 2 Pro/ Mavic 2 zoom/ Mavic Mini/DJI Mini2/Spark users to recover their batteries. So don’t be lazy to give a try on this step even though it is a little bit techy and requires some stuff.
For this step you need,
- CP2112 interface adapter.
- Dupont line cables connecting cables (Male-Female).
- DJI Battery Repair software.
- Windows PC.
- Download and install the DJI battery killer software to the PC.
- Take the CP2112 interface adapter and inspect its pins. You would see seven input pins named VCC, GND, SDA, SCL, WAK, INT, and RST. From them, we just need to use three pins which are GND, SDA, and SCL.
- Take three Dupont line cables and connect their female sides to GND, SDA, and SCL.
- Then connect their Male ports to the correct pins of the battery. DJI Mavic Air/Mavic Air 2/Mavic Air 2S/ Mavic 2 Pro/ Mavic 2 zoom/ Mavic Mini/DJI Mini2/Spark battery GND, SDA, and SCL pins are shown below.
DJI Mavic Air Battery Pins (GND, SCL, SDA)
DJI Mavic Air 2/ Air 2s Battery Pins (GND, SCL, SDA)
DJI Mavic 2 Pro/ Zoom Battery Pins (GND, SCL, SDA)
DJI Mavic Mini Battery Pins (GND, SCL, SDA)
DJI Mini 2 Battery Pins (GND, SCL, SDA)
DJI Mini 2 Battery Pins (GND, SCL, SDA)
DJI Spark Battery Pins (GND, SCL, SDA)
- Then connect the CP2112 adapter to the PC using a USB cable.
- Open the DJI battery killer software on your PC.
- Then click on “Connect”.
- Then click on “Read Info”.
- Then click on “Unseal” and “Unseal 2”.
- After that click on “Clear PF” and “Clear PF2”. Now the PF flags would be clear and the battery would start blinking and the issue is fixed.
- Click “Exit” and close the application. Unplug the battery and charge it fully and enjoy it.
DJI Mavic Pro won’t turn on.
Most of the time, DJI Mavic Pro won’t turn on when the battery has gone into hibernation or the battery management system has shut down because of power failures.
Solution 1: Wake the battery from hibernation.
If your Mavic Pro battery has gone into hibernation, you won’t be able to manually turn off the battery power LED.
- Power on the battery and leave the battery unattended for 5 minutes. Then the power LED would turn off.
- Then recharge the battery and bring it out from hibernation mode.
Solution 2: Clear PF flags and recover the DJI battery.
For this step you need,
- BQ Studio software.
- EV2300 EVM interface board (Buy on Aliexpress).
- Uncover the Mavic Pro battery shell.
- And take out the board covering the BMS (battery management system) of the battery.
- Now you would see all the metallic connecting points (SCL, SDA, PRES-M, GND, V1, V2, V3, etc). From these, we need SCL, SDA, and GND)
- When inspecting the EV2300 interface board, you would see ports named SMBD, SMBC, and GND. Now we need to connect them by soldering connection cables connected to those ports to the Mavic Pro’s BMS (battery management system).
Make sure to connect the EV2300 ports with the correct Mavic Pros battery’s BMS port.
- SMBC -> SCL
- SMBD -> SDA
- GND -> GND
- Download and install the BQ Studio.
- Connect the EV2300 to the PC and open the BQ Studio application. If nothing is shown tap the “Refresh” button.
- Go to the “Seal Auth” tab and unseal the battery by selecting the “Unseal” option and pressing the “Go” button.
- Go back to the SBS tab and hit “Refresh”. Now you’ll see the permanent failure flag in IT status.
- Go to the “Pro” tab and type word 0024 at the SMB command 00. Then hit “write”. (Read all about BQ Studio and commands)
- Go back to the SBS tab and hit “Refresh”. But still, the PF flag would stay active.
- Go back to the “Pro” tab and type word 0029 at the SMB command 00. Then hit “write”. (Read all about BQ Studio and commands)
- Go back to the SBS tab and hit “Refresh”. Now you’ll see the PF flag (Permanent failure) has cleared.
- Go to the “Seal Auth” tab and select “Seal”. Then click the “Go” button.
- Now the battery issue is fixed and you just have to unplug connected wires from EV2300 and set up carefully the battery as it was.
- Connect the battery to the charger and charge the battery fully and enjoy it.